AWS Settings
• 3 min to read •
Amazon Web Services, also known as AWS, is a cloud computing service provided by Amazon. It offers applications and infrastructure as a service and lets developers access computer resources in the cloud using a web browser. The company provides the platform as well as support services, such as application development, data storage, and networking.
Virtual machines on AWS, also called instances, have many advantages. You can scale the instances with more resources like RAM, CPU etc. Also, you can start and stop easily and pay for what you use, AWS provide different platforms (operating systems).
With Amazon EC2 (Elastic Compute Cloud), you can set up and configure the operating system and applications that run on your instance.
Check Amazon Elastic Compute Cloud Documentation for more information on how to launch, connect to, and use different instance on Amazon EC2.
After you create and configure an instance on Amazon portal, it can be added to your Syxsense console.
|
Important Information By default, managing options for AWS devices are limited. For overall management of the AWS device, Syxsence agent should be installed through AWS portal. Required IAM Permissions for the Access Key: To use the integration features, the IAM account associated with the Access Key must have the following permissions:
|
|
Prerequisites A Syxsense Manage, Syxsense Secure or Enterprise account that has 'Admin' permissions An AWS account |
Guided walk-through: AWS IntergationGuided walk-through: AWS Intergation
| ❶ |
Sign-in to the AWS Portal Click the User Name in the right upper corner > ‘Security credentials’ > ‘Create access key’ Note down Access key ID, Secret access key and the Region.Drop-down TitleDrop-down Title  |
| ❷ |
Open your Syxsense instance. Click on Settings 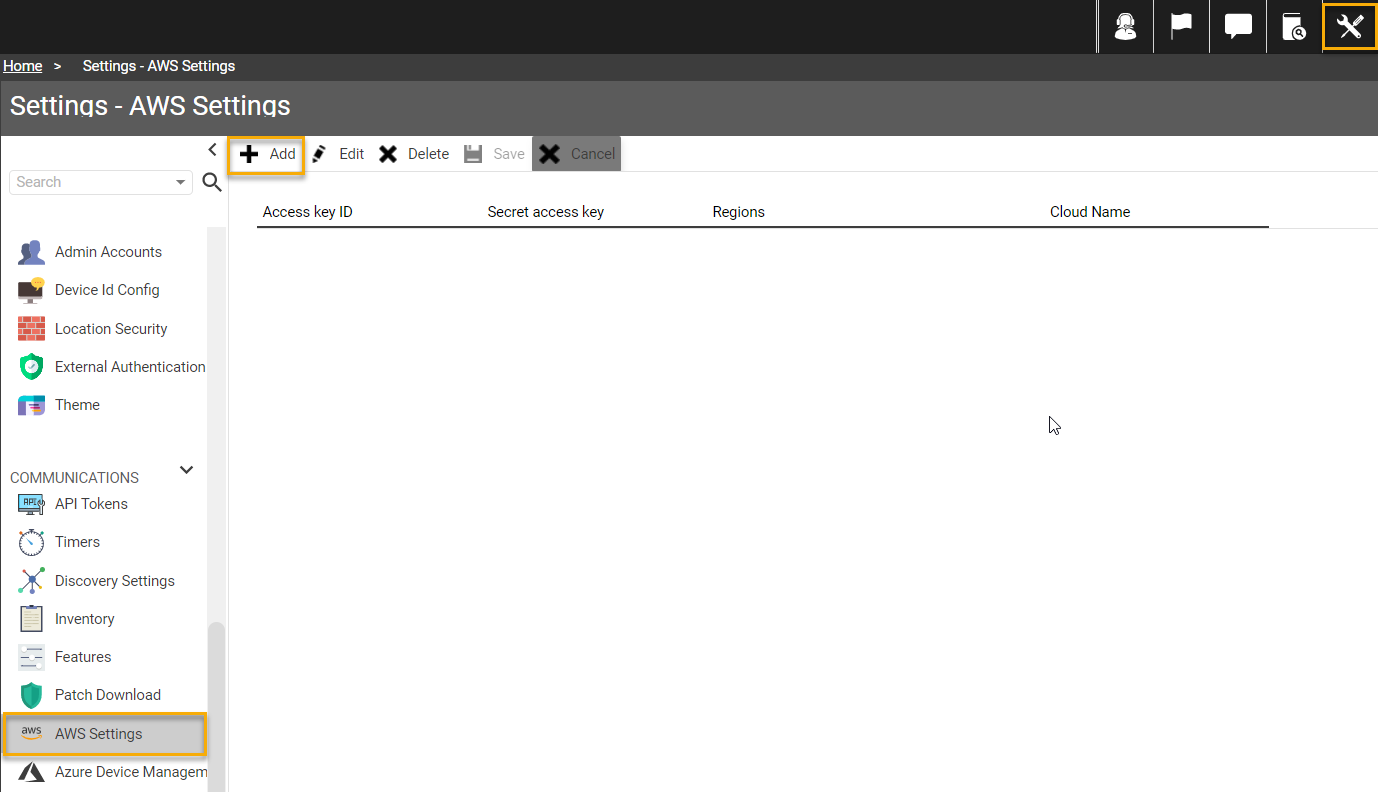 |
| ❸ |
In the popup window enter your account details (highlighted on the screenshot from Step 1): Access key ID e.g. 'AKIATBIMO7ML5Y5APNWN' ① Secret access key ② Specify unique cloud name (may be random, only for internal use) ③ Select a Region ④ Click ‘Save’Drop-down TitleDrop-down Title 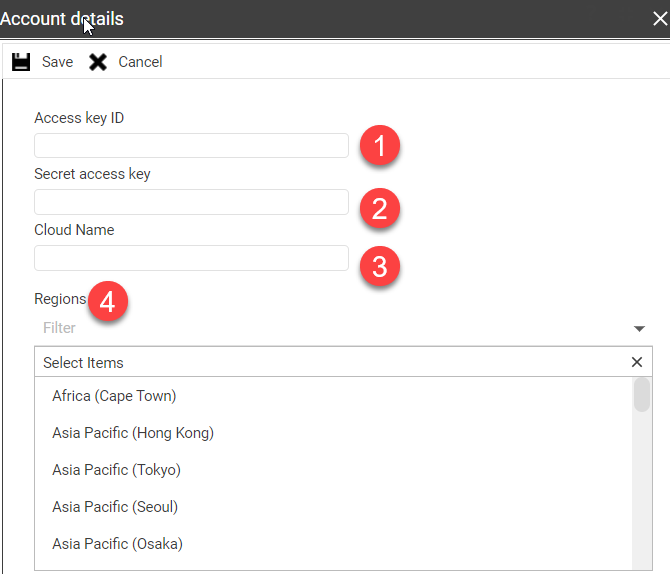 |
| ❹ |
Afterwards the ‘AWS Cloud’ folder under Devices section of the console will be generated (it does not exists by default). All the devices will be listed here. Folders' names are identical to the Cloud names.Drop-down TitleDrop-down Title 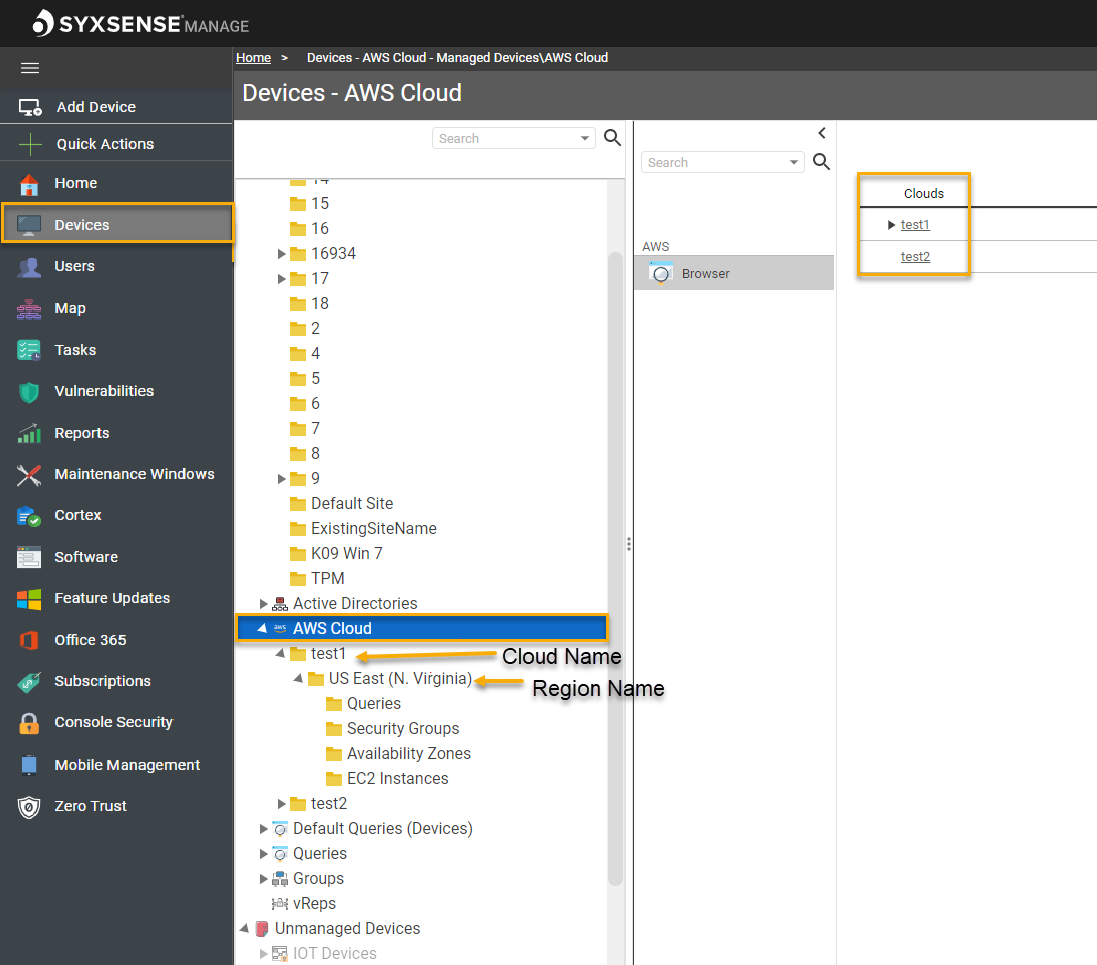 |
Discovery: AWS Devices TreeDiscovery: AWS Devices Tree
| ❶ |
The followings subfolders are present under each Region folder. All the data is pulled from the AWS portal. See the description below.Drop-down TitleDrop-down Title 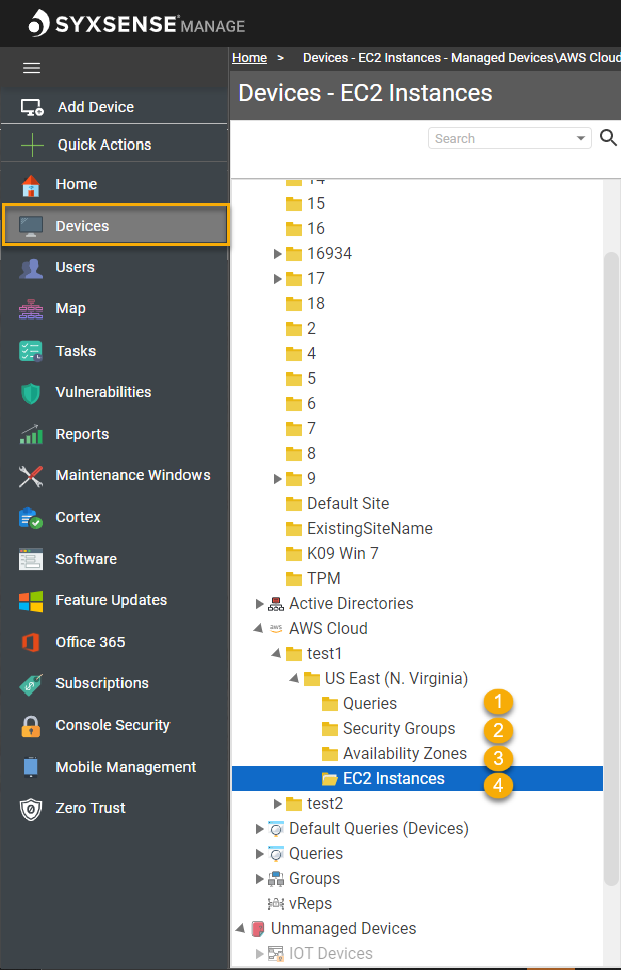 |
| ❷ |
① Queries There no default queries, they can be created to filter devices by certain criteria. More information on how to use Query Designer can be found on Queries help page. A query for AWS devices can be used only to group devices, these groups can’t be targeted with tasks. Grouping devices is useful to show similarities or differences in values. Now only ‘=’ Operator is available for AWS devices in Query Designer. There is no 'Value' drop-down list available, this data should be entered manually. Drop-down TitleDrop-down Title  |
| ❸ |
② Security Groups AWS handles firewall configuration using Security Groups. Every EC2 instance or other service with an Elastic Network Interface (ENI) uses its security group configuration to decide which packets to drop and what type of traffic should be allowed. You can add rules on the portal to allow specific traffic to your instance. On the portal they can be found in the left menu under ‘Network and Security’ > ‘Security Groups’ Drop-down TitleDrop-down Title 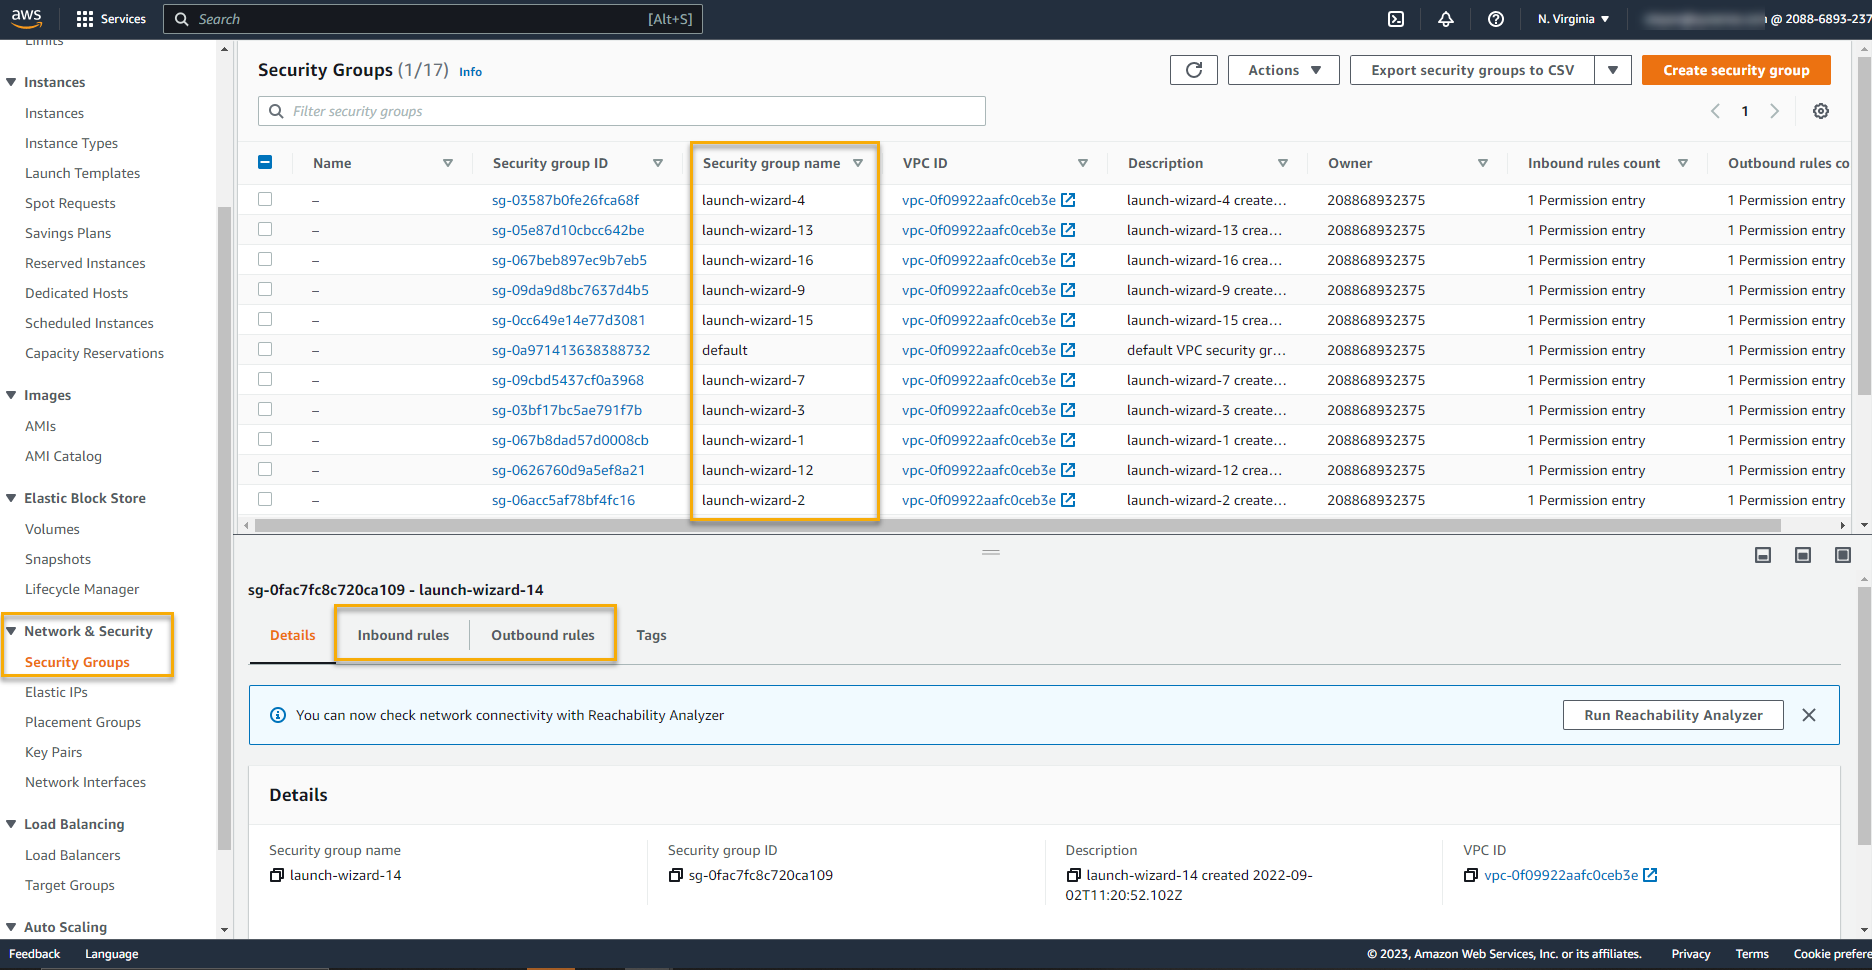 |
| ❹ |
③ Availability Zones AWS Availability Zones are a feature of the AWS Cloud that allows you to isolate your applications and data from potential outages in other Availability Zones. In AWS portal click EC2, on the right upper part of the screen, find 'Account Attributes' block, click Zones in it. Scroll to the bottom and find Availability Zones. Drop-down TitleDrop-down Title 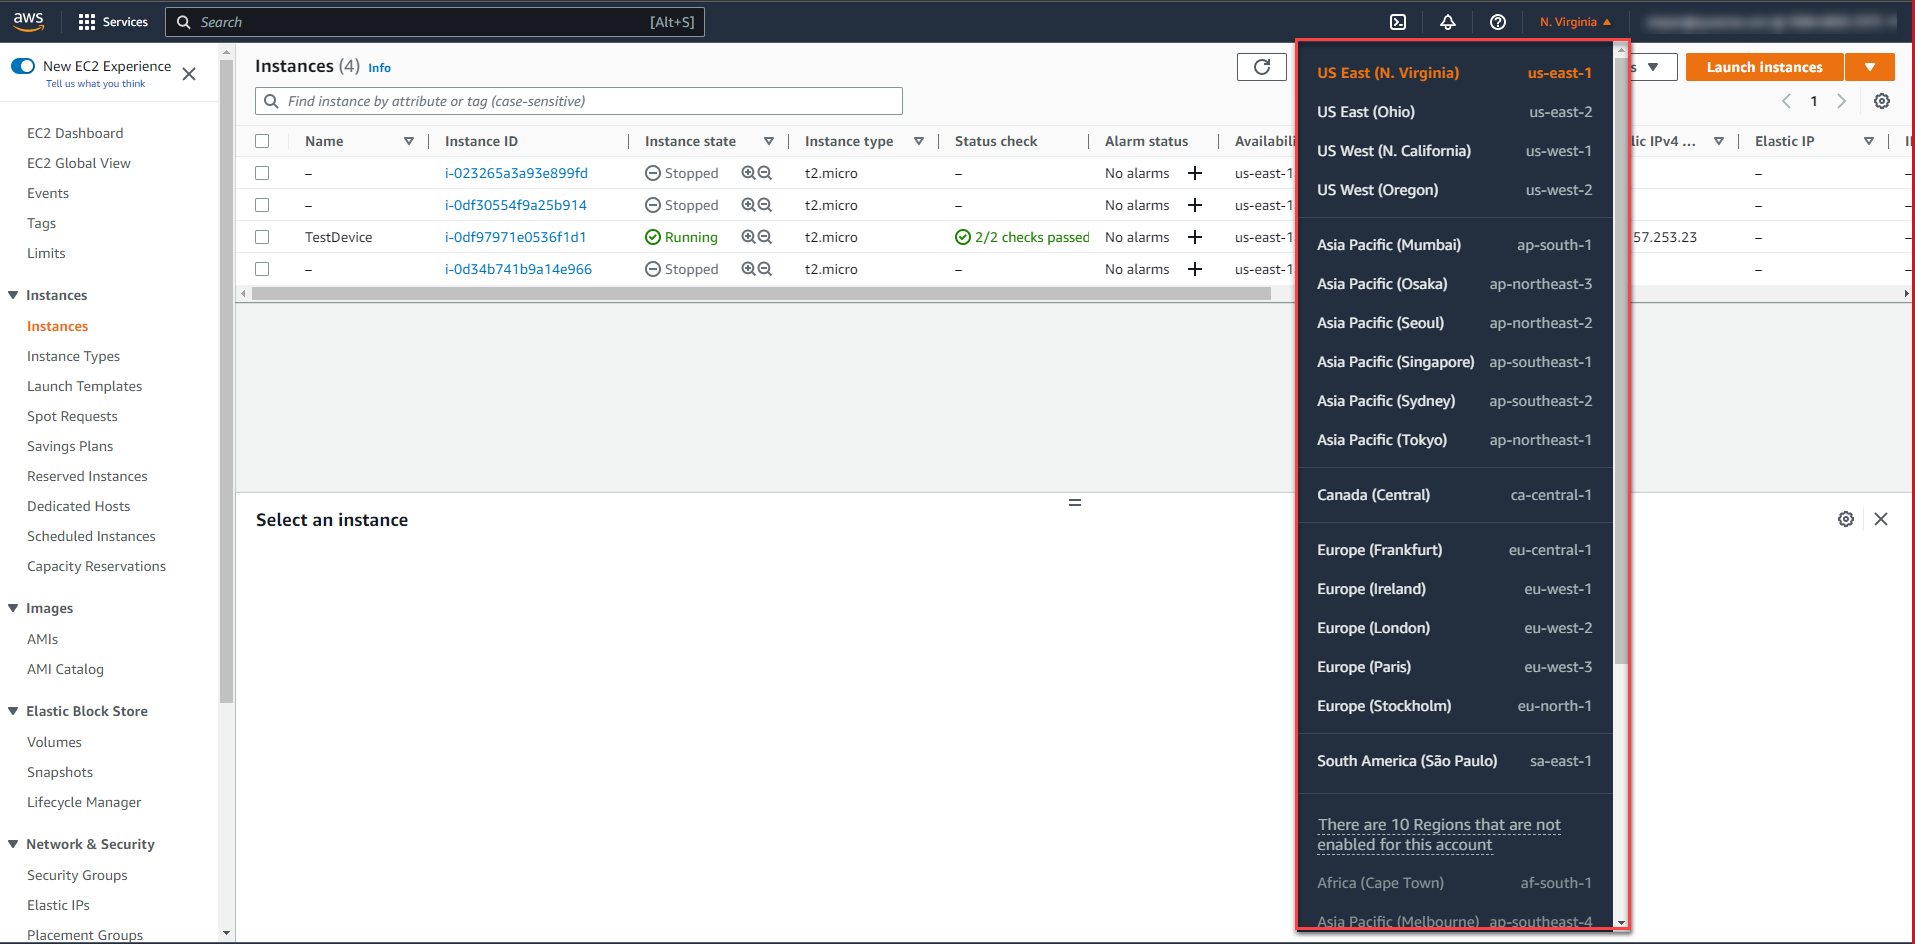 |
| ❺ |
④ EC2 Instances These are all virtual servers that you boot up in the cloud. Double-click the folder to see the list of devices. All device data (Instance ID, State and Platform Details) is pulled from AWS portal. By default, device name is not indicated, only Instance ID. The device status can be updated by clicking ‘Refresh’ button on the toolbar. By default, the available options in the toolbar are limited by the following:
For overall management of the device, Syxsence agent should be installed. Check the Implementation and Discovery help page for detailed tutorials.Drop-down TitleDrop-down Title 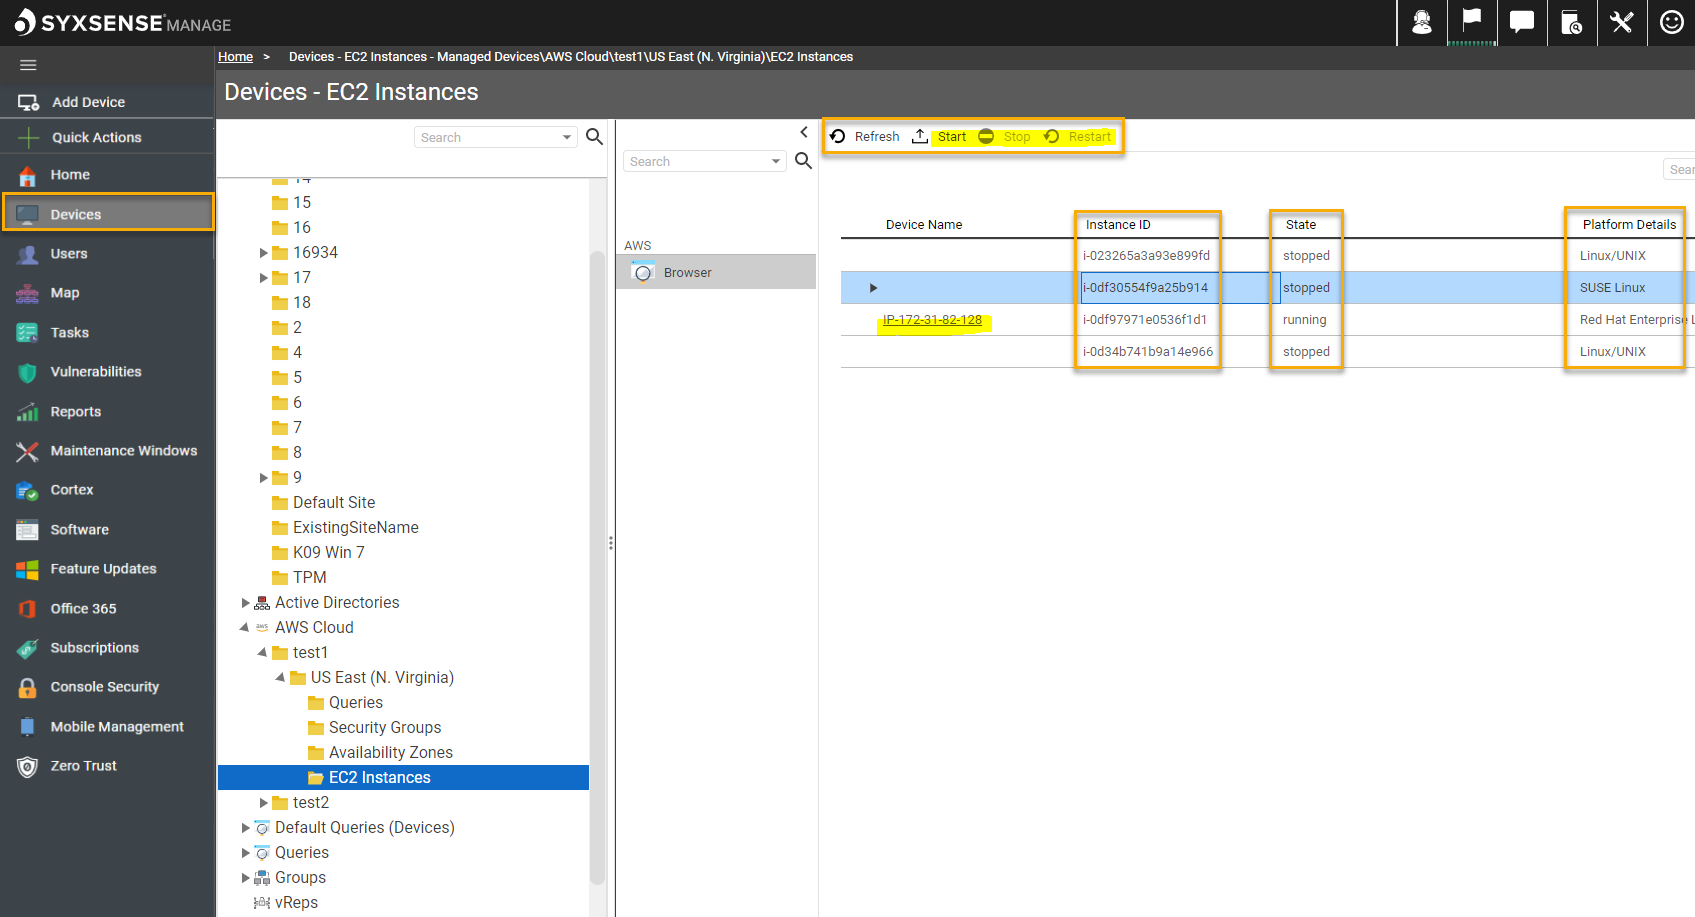 |
Last Update: July, 2024
Copyright ©2024 by Syxsense, Inc. All Rights Reserved